All the course slides are Jupyter notebooks; browser-based computational notebooks.
Code cells are executed by putting the cursor into the cell and hitting shift + enter. For more info see the documentation.
The first two lecture's homework assignments will be Jupyter notebooks. You can import the notebooks from Moodle into your JupyterHub space. You can execute them on the JupyterHub or download them and run them them locally if you're already set-up.
For submission, you can directly submit the folder containing all notebooks of a lecture from within the JupyterHub/Moodle integration. From the homework task on Moodle, you should be able to launch the notebooks in your JupyterHub. Once the homework completed, you should be able to see the folders you have worked on from your JupyterHub within the submission steps on Moodle. See Logistics and Homework for details.
Starting from lecture 3, exercise scripts will be mostly standalone regular Julia scripts that have to be uploaded to your private GitHub repo (shared with the teaching staff only). Details in Logistics.
You can access the JupyterHub from the General section in Moodle, clicking on 
Upon login to the server, you should see the following launcher environment, including a notebook (file) browser, ability to create a notebook, launch a Julia console (REPL), or a regular terminal.

Follow the instructions from the Julia Download page to install Julia v1.11 (which is using the Juliaup Julia installer under the hood).
; that natively works on Unix-based systems. On Windows, you can access the Windows shell by typing Powershell within the shell mode, and exit it typing exit, as described here.Ensure you have a text editor with syntax highlighting support for Julia. We recommend to use VSCode, see below. However, other editors are available too such as Sublime, Emacs, Vim, Helix, etc.
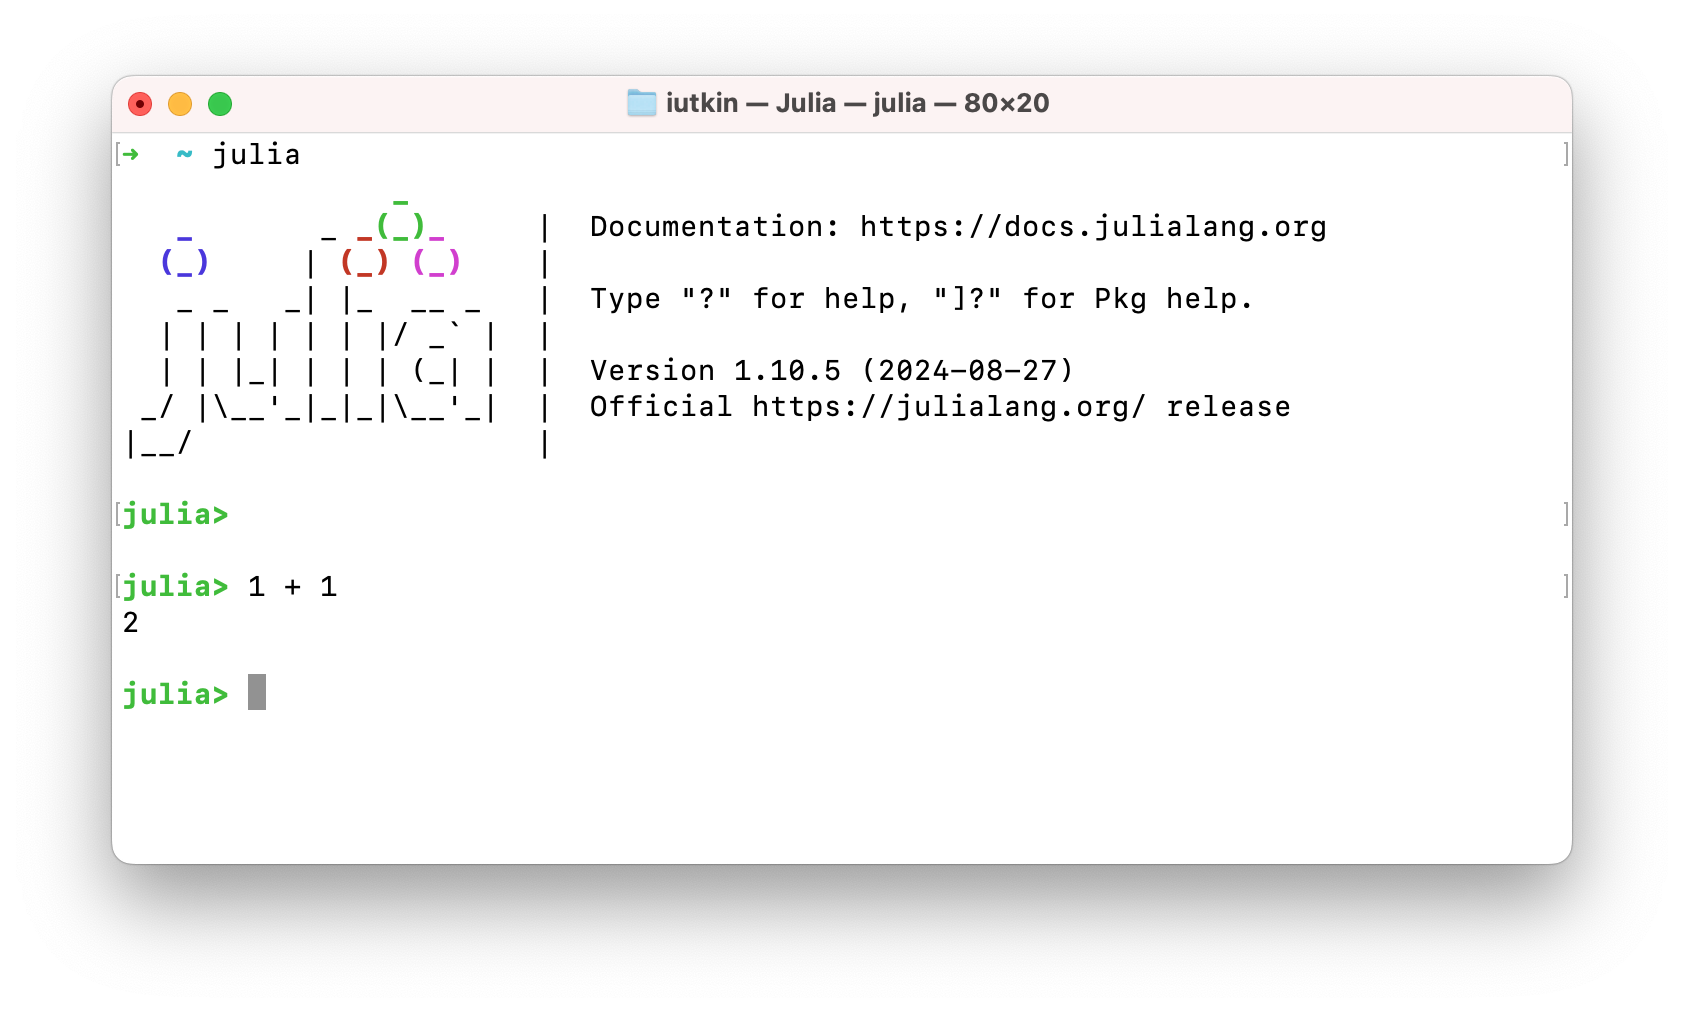
From within the terminal, type
juliato make sure that the Julia REPL (aka terminal) starts. Then you should be able to add 1+1 and verify you get the expected result. Exit with Ctrl-d.
If you'd enjoy a more IDE type of environment, check out VS Code. Follow the installation directions for the Julia VS Code extension.
VS Code's Remote-SSH extension allows you to connect and open a remote folder on any remote machine with a running SSH server. Once connected to a server, you can interact with files and folders anywhere on the remote filesystem (more).
To get started, follow the install steps.
Then, you can connect to a remote host, using ssh user@hostname and your password (selecting Remote-SSH: Connect to Host... from the Command Palette).
Advanced options permit you to access a remote compute node from within VS Code.
Julia: Start REPL from the Command Palette. Displaying a plot from a Julia instance launched from the remote terminal (which allows, e.g., to include custom options such as ENV variables or load modules) will fail. To work around this limitation, select Julia: Connect external REPL from the Command Palette and follow the prompted instructions.Now that you have a running Julia install, launch Julia (e.g. by typing julia in the shell since it should be on path)
juliaWelcome in the Julia REPL (command window). There, you have 3 "modes", the standard
[user@comp ~]$ julia
               _
   _       _ _(_)_     |  Documentation: https://docs.julialang.org
  (_)     | (_) (_)    |
   _ _   _| |_  __ _   |  Type "?" for help, "]?" for Pkg help.
  | | | | | | |/ _` |  |
  | | |_| | | | (_| |  |  Version 1.11.6 (2025-07-09)
 _/ |\__'_|_|_|\__'_|  |  Official https://julialang.org/ release
|__/                   |

julia>
the shell mode by hitting ;, where you can enter Unix commands,
shell>and the Pkg mode (package manager) by hitting ], that will be used to add and manage packages, and environments,
(@v1.11) pkg>You can interactively execute commands in the REPL, like adding two numbers
julia> 2+2
4

julia>
Within this class, we will mainly work with Julia scripts. You can run them using the include() function in the REPL
julia> include("my_script.jl")Alternatively, you can also execute a Julia script from the shell
julia -03 my_script.jlhere passing the -O3 optimisation flag.
The Pkg mode permits you to install and manage Julia packages, and control the project's environment.
Environments or Projects are an efficient way that enable portability and reproducibility. Upon activating a local environment, you generate a local Project.toml file that stores the packages and version you are using within a specific project (code-s), and a Manifest.toml file that keeps track locally of the state of the environment.
To activate an project-specific environment, navigate to your targeted project folder, launch Julia
mkdir my_cool_project
cd my_cool_project
julia
and activate it
julia> ]

(@v1.11) pkg>

(@v1.11) pkg> activate .
  Activating new environment at `~/my_cool_project/Project.toml`

(my_cool_project) pkg>
Then, let's install the Plots.jl package
(my_cool_project) pkg> add Plotsand check the status
(my_cool_project) pkg> st
      Status `~/my_cool_project/Project.toml`
  [91a5bcdd] Plots v1.22.3
as well as the .toml files
julia> ;

shell> ls
Manifest.toml Project.toml
We can now load Plots.jl and plot some random noise
julia> using Plots

julia> heatmap(rand(10,10))
Let's assume you're handed your my_cool_project to someone to reproduce your cool random plot. To do so, you can open julia from the my_cool_project folder with the --project option
cd my_cool_project
julia --project
Or you can rather activate it afterwards
cd my_cool_project
julia
and then,
julia> ]

(@v1.11) pkg> activate .
  Activating environment at `~/my_cool_project/Project.toml`

(my_cool_project) pkg>

(my_cool_project) pkg> st
      Status `~/my_cool_project/Project.toml`
  [91a5bcdd] Plots v1.40.20
Here we go, you can now share that folder with colleagues or with yourself on another machine and have a reproducible environment 🙂
On the CPU, multi-threading is made accessible via Base.Threads. To make use of threads, Julia needs to be launched with
julia --project -t autowhich will launch Julia with as many threads are there are cores on your machine (including hyper-threaded cores). Alternatively set the environment variable JULIA_NUM_THREADS, e.g. export JULIA_NUM_THREADS=2 to enable 2 threads.
The CUDA.jl module permits to launch compute kernels on Nvidia GPUs natively from within Julia. JuliaGPU provides further reading and introductory material about GPU ecosystems within Julia.
The following steps permit you to install MPI.jl on your machine and test it:
If Julia MPI is a dependency of a Julia project MPI.jl should have been added upon executing the instantiate command from within the package manager see here. If not, MPI.jl can be added from within the package manager (typing add MPI in package mode).
Install mpiexecjl:
julia> using MPI

julia> MPI.install_mpiexecjl()
[ Info: Installing `mpiexecjl` to `HOME/.julia/bin`...
[ Info: Done!
Then, one should add HOME/.julia/bin to PATH in order to launch the Julia MPI wrapper mpiexecjl.
Running a Julia MPI code <my_script.jl> on np MPI processes:
$ mpiexecjl -n np julia --project <my_script.jl>To test the Julia MPI installation, launch the l9_hello_mpi.jl using the Julia MPI wrapper mpiexecjl (located in ~/.julia/bin) on, e.g., 4 processes:
$ mpiexecjl -n 4 julia --project ./l9_hello_mpi.jl
$ Hello world, I am 0 of 3
$ Hello world, I am 1 of 3
$ Hello world, I am 2 of 3
$ Hello world, I am 3 of 3On macOS, you may encounter this issue. To fix it, define following ENV variable:
$ export MPICH_INTERFACE_HOSTNAME=localhostand add -host localhost to the execution script:
$ mpiexecjl -n 4 -host localhost julia --project ./hello_mpi.jlGPU computing on Alps at CSCS. The supercomputer Alps is composed of 2688 compute nodes, each hosting 4 Nvidia GH200 96GB GPUs. We have a 4000 node hour allocation for our course on the HPC Platform Daint, a versatile cluster (vCluster) within the Alps infrastructure.
The login procedure is as follow. First a login to the front-end (or login) machine Ela (hereafter referred to as "ela") is needed before one can log into Daint. Login is performed using ssh. We will set-up a proxy-jump in order to simplify the procedure and directly access Daint (hereafter referred to as "daint")
Both daint and ela share a home folder. However, the scratch folder is only accessible on daint. We can use VS code in combination with the proxy-jump to conveniently edit files on daint's scratch directly. We will use a Julia "uenv" to have all Julia-related tools ready.
Make sure to have the Remote-SSH extension installed in VS code (see here for details on how-to).
Please follow the steps listed hereafter to get ready and set-up on daint.
Fetch your personal username and password credentials from Moodle.
Open a terminal (in Windows, use a tool as e.g. PuTTY or OpenSSH) and ssh to ela and enter the password:
ssh <username>@ela.cscs.chGenerate a ed25519 keypair. On your local machine (not ela), do ssh-keygen leaving the passphrase empty. Then copy your public key to the remote server (ela) using ssh-copy-id.
ssh-keygen -t ed25519
ssh-copy-id -i ~/.ssh/id_ed25519.pub <username>@ela.cscs.ch
Alternatively, you can copy the keys manually.
Once your key is added to ela, manually connect to daint to authorize your key for the first time, while making sure you are logged-in in ela. Execute:
[classXXX@ela2 ~]$ ssh daintThis step shall prompt you to accept the daint server’s SSH key and enter the password you got from Moodle again.
Edit your ssh config file located in ~/.ssh/config and add following entries to it, making sure to replace <username> and key file with correct names, if needed:
Host daint.alps
  HostName daint.alps.cscs.ch
  User <username>
  IdentityFile ~/.ssh/id_ed25519
  ProxyJump <username>@ela.cscs.ch
  AddKeysToAgent yes
  ForwardAgent yes
Now you should be able to perform password-less login to daint as following
ssh daint.alpsAt this stage, you are logged into daint, but still on a login node and not a compute node.
You can reach your home folder upon typing cd $HOME, and your scratch space upon typing cd $SCRATCH. Always make sure to run and save files from scratch folder.
To make things easier, you can create a soft link from your $HOME pointing to $SCRATCH
ln -s $SCRATCH scratchMake sure to remove any folders you may find in your scratch as those are the empty remaining from last year's course.
The Julia setup on daint is handled by uenv, user environments that provide scientific applications, libraries and tools. The Julia uenv provides a fully configured environment to run Julia at Scales on Nvidia GPUs, using MPI as communication library. Julia is installed and managed by JUHPC which wraps Juliaup and ensures it smoothly works on the supercomputer.
Only the first time you will need to pull the Julia uenv on daint, and run Juliaup to install Julia.
Open a terminal (other than from within VS code) and login to daint:
ssh daint.alpsDownload the Julia uenv image:
uenv image pull julia/25.5:v1Work-around a current limitations of Juliaup on Alps
mkdir $SCRATCH/tmp

export TMPDIR="$SCRATCH/tmp"
Once the download complete, start the uenv:
uenv start --view=juliaup,modules julia/25.5:v1Adding a view (--view=juliaup,modules) gives you explicit access to Juliaup and to modules.
Only the first time, call into juliaup in order to install latest Julia
juliaupAt this point, you should be able to launch Julia by typing julia in the terminal.
Once the initial setup is completed, you can simply use Julia on daint by starting the Julia uenv, accessing a compute node (using SLURM), and launching Julia to add CUDA.jl package:
SSH into daint and start the Julia uenv
ssh daint.alps

uenv start --view=juliaup,modules julia/25.5:v1
The next step is to secure an allocation using salloc, a functionality provided by the SLURM scheduler. Use salloc command to allocate one node (N1) on the GPU partition -C'gpu' on the project class04 for 1 hour:
salloc -C'gpu' -Aclass04 -N1 --time=01:00:00squeue --me.👉 Running a remote job instead? Jump right there
Once you have your allocation (salloc) and the node, you can access the compute node by using the following srun command:
srun -n1 --pty /bin/bash -lLaunch Julia in global or project environment
juliaWithin Julia, enter the package mode ], check the status, and add CUDA.jl and MPI.jl:
julia> ]

(@v1.12) pkg> st

(@v1.12) pkg> add CUDA, MPI
Then load CUDA and query version info
julia> using CUDA

julia> CUDA.versioninfo()
CUDA toolchain:
- runtime 12.8, local installation
- driver 550.54.15 for 13.0
- compiler 12.9

# [skipped lines]

Preferences:
- CUDA_Runtime_jll.version: 12.8
- CUDA_Runtime_jll.local: true

4 devices:
  0: NVIDIA GH200 120GB (sm_90, 93.953 GiB / 95.577 GiB available)
  1: NVIDIA GH200 120GB (sm_90, 93.951 GiB / 95.577 GiB available)
  2: NVIDIA GH200 120GB (sm_90, 93.955 GiB / 95.577 GiB available)
  3: NVIDIA GH200 120GB (sm_90, 93.954 GiB / 95.577 GiB available)
Try out your first calculation on the GH200 GPU
julia> a = CUDA.ones(3,4);

julia> b = CUDA.rand(3,4);

julia> c = CUDA.zeros(3,4);

julia> c .= a .+ b
If you made it to here, you're most likely all set 🚀
There is no interactive visualisation on daint. Make sure to produce png or gifs. Also to avoid plotting to fail, make sure to set the following ENV["GKSwstype"]="nul" in the code. Also, it may be good practice to define the animation directory to avoid filling a tmp, such as
ENV["GKSwstype"]="nul"
if isdir("viz_out")==false mkdir("viz_out") end
loadpath = "./viz_out/"; anim = Animation(loadpath,String[])
println("Animation directory: $(anim.dir)")You can use the nvidia-smi command to monitor GPU usage on a compute node on daint. Just type in the terminal or with Julia's REPL (in shell mode).
VS code support to remote connect to daint is getting better and better. If feeling adventurous, try out the Connecting with VS Code procedure. Any feedback welcome.
If you do not want to use an interactive session you can use the sbatch command to launch a job remotely on the machine. Example of a submit.sh you can launch (without need of an allocation) as sbatch submit.sh:
#!/bin/bash -l
#SBATCH --account=class04
#SBATCH --job-name="my_gpu_run"
#SBATCH --output=my_gpu_run.%j.o
#SBATCH --error=my_gpu_run.%j.e
#SBATCH --time=00:10:00
#SBATCH --nodes=1
#SBATCH --ntasks-per-node=1
#SBATCH --gpus-per-task=1

srun --uenv julia/25.5:v1 --view=juliaup julia --project <my_julia_gpu_script.jl>sbatch command or to include --uenv julia/25.5:v1 --view=juliaup in the srun command.Some tasks and homework, are prepared as Jupyter notebook and can easily be executed within a JupyterLab environment. CSCS offers a convenient JupyterLab access.
First, create a soft link from your $HOME pointing to $SCRATCH (do this on daint):
ln -s $SCRATCH scratchHead to https://jupyter-daint.cscs.ch/.
Login with your username and password you've set for in the Account setup step.
Follow the additional procedure to set up the Julia kernel in Jupyter.
In the Advanced options, provide as uenv julia/25.5:v1 and jupyter as view.
Select the duration you want and Launch JupyterLab.
Only the first time – open the console from the JupyterLab launcher and run install_ijulia
From within JupyterLab, upload the notebook to work on and get started!
Given that daint's scratch is not mounted on ela, it is unfortunately impossible to transfer files from/to daint using common sftp tools as they do not support the proxy-jump. Various solutions exist to workaround this, including manually handling transfers over terminal, using a tool which supports proxy-jump, or VS code.
To use VS code as development tool, make sure to have installed the Remote-SSH extension as described in the VS Code Remote - SSH setup section. Then, in VS code Remote-SSH settings, make sure the Remote Server Listen On Socket is set to true.
The next step should work out of the box. You should be able to select daint from within the Remote Explorer side-pane. You should get logged into daint. You now can browse your files, change directory to, e.g., your scratch at /capstor/scratch/cscs/<username>/. Just drag and drop files in there to transfer them.
The following step should allow you to run distributed memory parallelisation application on multiple GPU nodes on Alps.
Make sure to have the Julia GPU environment loaded
uenv start --view=juliaup,modules julia/25.5:v1Then, you would need to allocate more than one node, let's say 2 nodes for 1 hours, using salloc
salloc -C'gpu' -Aclass04 -N2 --time=01:00:00To launch a Julia (GPU) MPI script on 2 nodes (and e.g. 8 GPUs) using MPI, you can simply use srun
MPICH_GPU_SUPPORT_ENABLED=1 IGG_CUDAAWARE_MPI=1 JULIA_CUDA_USE_COMPAT=false srun -N2 -n8 --ntasks-per-node=4 --gpus-per-task=1 julia --project <my_julia_mpi_script.jl>If you do not want to use an interactive session you can use the sbatch command to launch an MPI job remotely on daint. Example of a sbatch_mpi_daint.sh you can launch (without need of an allocation) as sbatch sbatch_mpi_daint.sh:
#!/bin/bash -l
#SBATCH --account=class04
#SBATCH --job-name="diff2D"
#SBATCH --output=diff2D.%j.o
#SBATCH --error=diff2D.%j.e
#SBATCH --time=00:05:00
#SBATCH --nodes=1
#SBATCH --ntasks=4
#SBATCH --ntasks-per-node=4
#SBATCH --gpus-per-task=1

export MPICH_GPU_SUPPORT_ENABLED=1
export IGG_CUDAAWARE_MPI=1 # IGG
export JULIA_CUDA_USE_COMPAT=false # IGG

srun --uenv julia/25.5:v1 --view=juliaup julia --project <my_julia_mpi_gpu_script.jl>
Make sure that the total number of tasks set with --ntasks is equal to --nodes times --ntasks-per-node.
You may want to leverage CUDA-aware MPI, i.e., passing GPU pointers directly through the MPI-based update halo functions, then make sure to export the following ENV variables:
export MPICH_RDMA_ENABLED_CUDA=1
export IGG_CUDAAWARE_MPI=1ID = 0 as we request --gpus-per-task=1. This implies that there is no need to rely on other mechanisms such as using shared memory MPI communicator to convert global to local MPI ranks for GPU selection (more about this the in CSCS doc).Using ImplicitGlobalGrid.jl on daint, one needs to ensure to set select_device = false in the init_global_grid kwarg:
init_global_grid(...; select_device = false)Profiling using the NVIDIA Nsight Systems is available with any uenv that comes with a CUDA compiler, including the Julia uenv. As a sampling profiler, it can be used to profile applications written in Julia by wrapping the application with the Nsight Systems profiler executable.
The profiler is triggered by using the nsys profile command, available upon loading the CUDA module. On daint prepare the working environment as following
uenv start --view=juliaup,modules julia/25.5:v1

ml cuda
Then, for example, request an allocation for 2 nodes in order to have access to 8 GH200 GPUs:
salloc -C'gpu' -Aclass04 -N2 --time=01:00:00To then profile an application (e.g. the 3D diffusion code), launch srun with the following parameters:
MPICH_GPU_SUPPORT_ENABLED=1 IGG_CUDAAWARE_MPI=1 JULIA_CUDA_USE_COMPAT=false srun -N2 -n8 --ntasks-per-node=4 --gpus-per-task=1 \
nsys profile --force-overwrite=true --start-later=true --capture-range=cudaProfilerApi --capture-range-end=stop -t nvtx,cuda,mpi --mpi-impl=mpich -o prof_hidecomm.%q{SLURM_PROCID}.%q{SLURM_JOBID} \
julia --project diff_3d_hidecomm.jl
This will launch the code on 2 nodes, 8 GPUs (4 tasks per node). srun will call into nsys profile to profile a specific portion of the code and report NVTX, CUDA and MPI traces for the MPICH MPI implementation. The produced output files are named after each global MPI rank. This procedure wraps the julia --project call by the profiler.
The produced output files (.nsys-rep extension) can be analysed using the NVIDIA Nsight Systems GUI application that you can download from NVIDIA website and run locally.