Software installation
Course slides and lecture material
All the course slides are reactive Pluto notebooks.
Code cells are executed by putting the cursor into the cell and hitting shift + enter. For more info see the documentation.
Exercises and homework
The homework assignments of the first three lectures are Pluto notebooks. You can download the notebooks from Moodle and run them locally. Starting from lecture 4, exercise scripts will be mostly standalone regular Julia scripts that have to be uploaded to your private GitHub repo (shared with the teaching staff only). Details in Logistics.
Installing Julia v1.12
Juliaup installer
Follow the instructions from the Julia Download page to install Julia v1.12 (which is using the Juliaup Julia installer under the hood).
Julia 1.13 is not yet supported
Pluto doesn’t support Julia 1.13 yet. Please install Julia 1.12 for the time being. After installing juliaup, type the following commmand in the terminal:
$ juliaup add 1.12
and after the installation completes, switch default Julia to 1.12 using this command:
$ juliaup default 1.12
For Windows users
When installing Julia 1.12 on Windows, make sure to check the “Add PATH” tick or ensure Julia is on PATH (see [help]). Julia’s REPL has a built-in shell mode you can access typing ; that natively works on Unix-based systems. On Windows, you can access the Windows shell by typing Powershell within the shell mode, and exit it typing exit, as described here.
Terminal + external editor
Ensure you have a text editor with syntax highlighting support for Julia. We recommend to use VSCode, see below. However, other editors are available too such as Sublime, Emacs, Vim, Helix, etc.
From within the terminal, type
julia
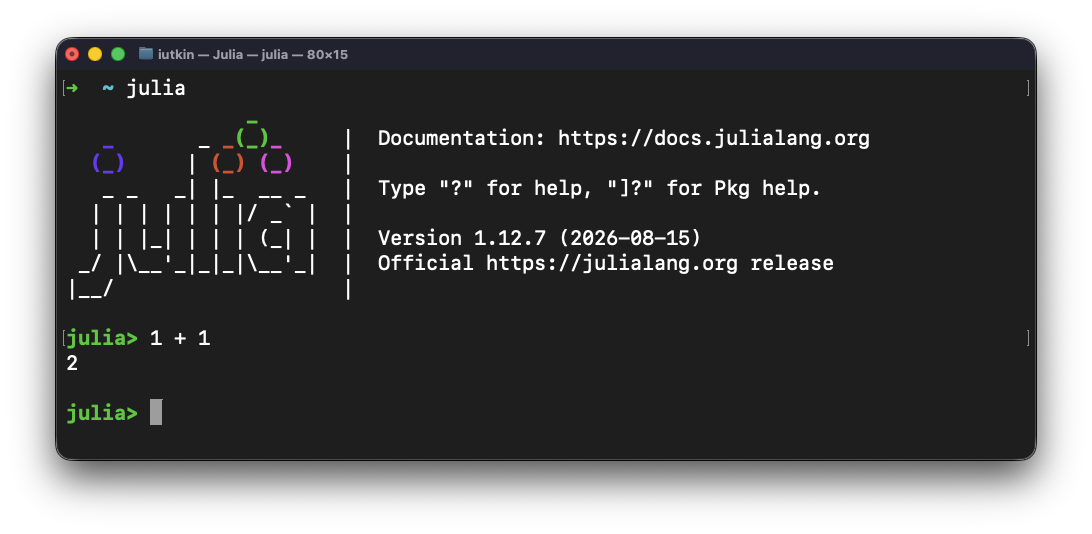
to make sure that the Julia REPL (aka terminal) starts. Then you should be able to add 1+1 and verify you get the expected result. Exit with Ctrl-d.
VS Code
If you’d enjoy a more IDE type of environment, check out VS Code. Follow the installation directions for the Julia VS Code extension.
VS Code Remote - SSH setup
VS Code’s Remote-SSH extension allows you to connect and open a remote folder on any remote machine with a running SSH server. Once connected to a server, you can interact with files and folders anywhere on the remote filesystem (more).
- To get started, follow the install steps.
- Then, you can connect to a remote host, using
ssh user@hostnameand your password (selectingRemote-SSH: Connect to Host...from the Command Palette). - Advanced options permit you to access a remote compute node from within VS Code.
Plots in remote VS Code
This remote configuration supports Julia graphics to render within VS Code’s plot pane. However, this “remote” visualisation option is only functional when plotting from a Julia instance launched as Julia: Start REPL from the Command Palette. Displaying a plot from a Julia instance launched from the remote terminal (which allows, e.g., to include custom options such as ENV variables or load modules) will fail. To work around this limitation, select Julia: Connect external REPL from the Command Palette and follow the prompted instructions.
Running Julia
First steps
Now that you have a running Julia install, launch Julia (e.g. by typing julia in the shell since it should be on path)
julia
Welcome in the Julia REPL (command window). There, you have 3 “modes”, the standard
[user@comp ~]$ julia
               _
   _       _ _(_)_     |  Documentation: https://docs.julialang.org
  (_)     | (_) (_)    |
   _ _   _| |_  __ _   |  Type "?" for help, "]?" for Pkg help.
  | | | | | | |/ _` |  |
  | | |_| | | | (_| |  |  Version 1.12.7 (2026-08-15)
 _/ |\__'_|_|_|\__'_|  |  Official https://julialang.org/ release
|__/                   |

julia>
the shell mode by hitting ;, where you can enter Unix commands,
shell>
and the Pkg mode (package manager) by hitting ], that will be used to add and manage packages, and environments,
(@v1.12) pkg>
You can interactively execute commands in the REPL, like adding two numbers
julia> 2+2
4

julia>
Within this class, we will mainly work with Julia scripts. You can run them using the include() function in the REPL
julia> include("my_script.jl")
Alternatively, you can also execute a Julia script from the shell:
julia my_script.jl
Package manager
The Pkg mode permits you to install and manage Julia packages, and control the project’s environment.
Environments or Projects are an efficient way that enable portability and reproducibility. Upon activating a local environment, you generate a local Project.toml file that stores the packages and version you are using within a specific project (code-s), and a Manifest.toml file that keeps track locally of the state of the environment.
To activate an project-specific environment, navigate to your targeted project folder, launch Julia
mkdir my_cool_project
cd my_cool_project
julia
and activate it
julia> ]

(@v1.12) pkg>

(@v1.12) pkg> activate .
  Activating new environment at `~/my_cool_project/Project.toml`

(my_cool_project) pkg>
Then, let’s install the CairoMakie.jl package
(my_cool_project) pkg> add CairoMakie
and check the status
(my_cool_project) pkg> st
      Status `~/my_cool_project/Project.toml`
  [13f3f980] CairoMakie v0.15.14
as well as the .toml files
julia> ;

shell> ls
Manifest.toml Project.toml
We can now load CairoMakie.jl and plot some random noise
julia> using CairoMakie

julia> heatmap(rand(10,10))
Let’s assume you’re handed your my_cool_project to someone to reproduce your cool random plot. To do so, you can open julia from the my_cool_project folder with the --project option
cd my_cool_project
julia --project
Or you can rather activate it afterwards
cd my_cool_project
julia
and then,
julia> ]

(@v1.12) pkg> activate .
  Activating environment at `~/my_cool_project/Project.toml`

(my_cool_project) pkg>

(my_cool_project) pkg> st
      Status `~/my_cool_project/Project.toml`
  [13f3f980] CairoMakie v0.15.14
Here we go, you can now share that folder with colleagues or with yourself on another machine and have a reproducible environment 🙂
Install Pluto
Next we will install Pluto, the notebook environment that we will be using during the course. Pluto is a Julia programming environment designed for interactivity and quick experiments.
Open the Julia REPL. Switch from Julia mode to Pkg mode by typing ] (closing square bracket) at the julia> prompt:
julia> ]

(@v1.12) pkg>
To install Pluto, run the following (case sensitive) command to add (install) the package to your system by downloading it from the internet. You should only need to do this once for each installation of Julia:
(@v1.12) pkg> add Pluto
You can now close the terminal.
Use a modern browser: Mozilla Firefox or Google Chrome
We need a modern browser to view Pluto notebooks with. Firefox and Chrome work best.
Second time: Running Pluto & opening a notebook
Repeat the following steps whenever you want to work on a project or homework assignment.
Step 1: Start Pluto
Start the Julia REPL, like you did during the setup. In the REPL, type:
julia> using Pluto

julia> Pluto.run()
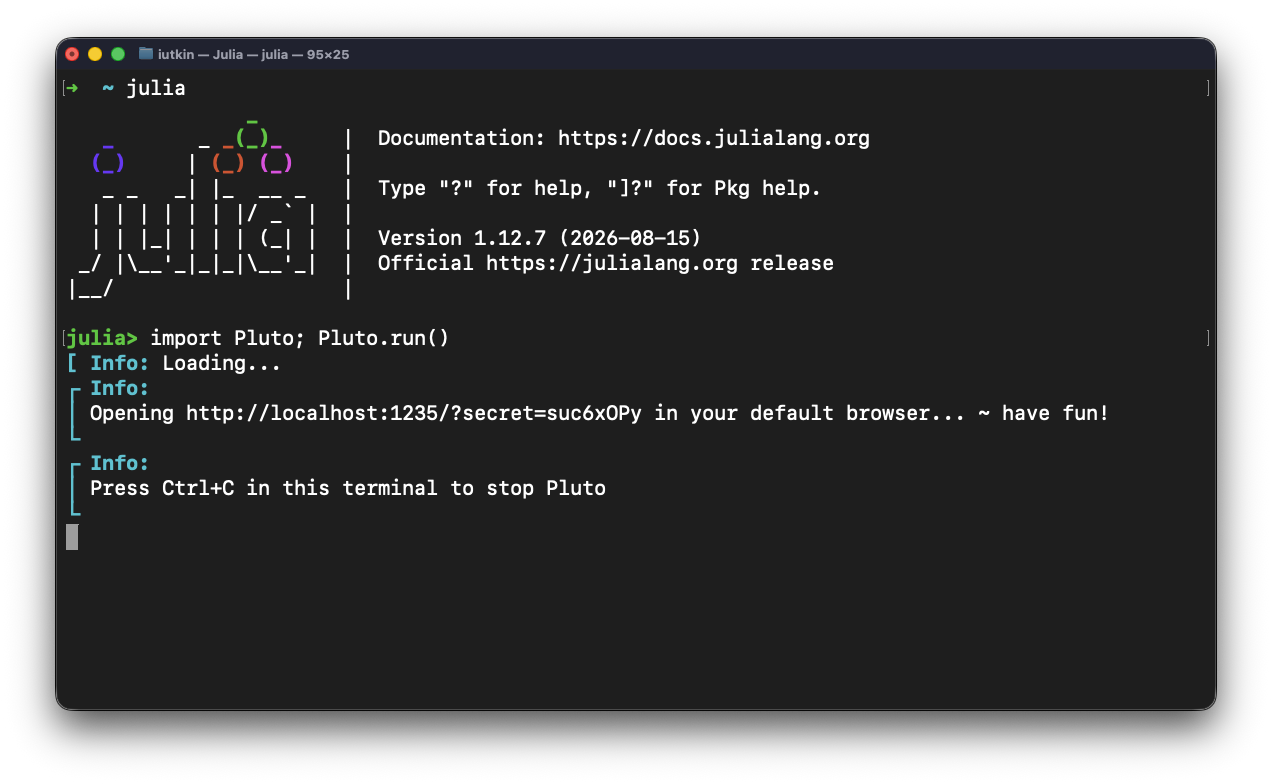
The terminal tells us to go to http://localhost:1234/ (or a similar URL). Let’s open Firefox or Chrome and type that into the address bar.

Getting to know Pluto
If you’re curious about what a Pluto notebook looks like, have a look at the Featured Notebooks. These notebooks are useful for learning some basics of Julia programming.
If you want to hear the story behind Pluto, have a look at the JuliaCon presentation.
If nothing happens in the browser the first time, close Julia and try again. And please let us know!
Step 2a: Opening a notebook from the web
This is the main menu - here you can create new notebooks, or open existing ones. Our homework assignments will always be based on a template notebook, available in this GitHub repository. To start from a template notebook on the web, you can paste the URL into the blue box and press ENTER.
For example, lecture 1 is available here. Go to this page, and on the top right, click on the button that says “Edit or run this notebook”. From these instructions, copy the notebook link, and paste it into the box. Press ENTER, and select OK in the confirmation box.
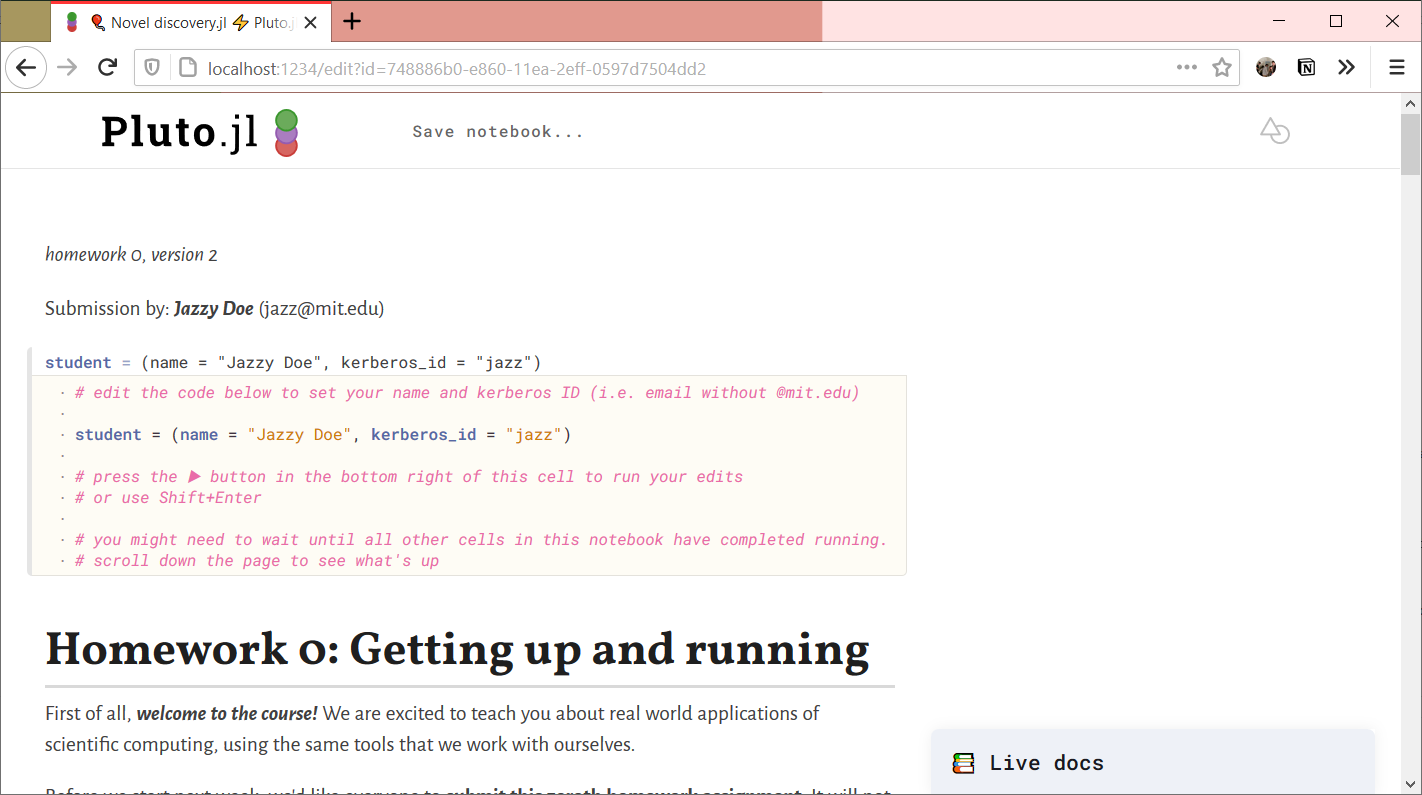
The first thing we will want to do is to save the notebook somewhere on our own computer; see below.
Step 2b: Opening an existing notebook file
When you launch Pluto for the second time, your recent notebooks will appear in the main menu. You can click on them to continue where you left off.
If you want to run a local notebook file that you have not opened before, then you need to enter its full path into the blue box in the main menu. More on finding full paths in step 3.
Step 3: Saving a notebook
We first need a folder to save our homework in. Open your file explorer and create one.
Next, we need to know the absolute path of that folder. Here’s how you do that in Windows and MacOS.
For example, you might have:
-
C:\Users\username\Documents\101-0250-01L_assignments\on Windows -
/Users/username/Documents/101-0250-01L_assignments/on MacOS -
/home/username/Documents/101-0250-01L_assignments/on Ubuntu
Now that we know the absolute path, go back to your Pluto notebook, and at the top of the page, click on “Save notebook…”.

This is where you type the new path+filename for your notebook:

Click Choose.
Step 4: Sharing a notebook
After working on your notebook (your code is autosaved when you run it), you will find your notebook file in the folder we created in step 3. This the file that you can share with others, or submit as your homework assignment to Canvas.
Multi-threading on CPUs
On the CPU, multi-threading is made accessible via Base.Threads. To make use of threads, Julia needs to be launched with
julia --project -t auto
which will launch Julia with as many threads are there are cores on your machine (including hyper-threaded cores). Alternatively set the environment variable JULIA_NUM_THREADS, e.g. export JULIA_NUM_THREADS=2 to enable 2 threads.
Julia on GPUs
The CUDA.jl module permits to launch compute kernels on Nvidia GPUs natively from within Julia. JuliaGPU provides further reading and introductory material about GPU ecosystems within Julia.
GPU computing on Alps
GPU computing on Alps at CSCS. The supercomputer Alps is composed of 2688 compute nodes, each hosting 4 Nvidia GH200 96GB GPUs. We have a 4000 node hour allocation for our course on the HPC Platform Daint, a versatile cluster (vCluster) within the Alps infrastructure.
Ask us, not CSCS
Since the course allocation is exceptional, make sure not to open any help tickets directly at CSCS help, but report questions and issue exclusively to our helpdesk room on Element. Also, better ask about good practice before launching anything you are unsure in order to avoid any disturbance on the machine.
The login procedure is as follow. First a login to the front-end (or login) machine Ela (hereafter referred to as “ela”) is needed before one can log into Daint. Login is performed using ssh. We will set-up a proxy-jump in order to simplify the procedure and directly access Daint (hereafter referred to as “daint”)
Both daint and ela share a home folder. However, the scratch folder is only accessible on daint. We can use VS code in combination with the proxy-jump to conveniently edit files on daint’s scratch directly. We will use a Julia “uenv” to have all Julia-related tools ready.
Make sure to have the Remote-SSH extension installed in VS code (see here for details on how-to).
Please follow the steps listed hereafter to get ready and set-up on daint.
Account setup
Special course accounts
The course accounts somewhat differ from regular account and do not require MFA. The connection procedure from CSCS’ user doc does thus not apply.
-
Fetch your personal username and password credentials from Moodle.
-
Open a terminal (in Windows, use a tool as e.g. PuTTY or OpenSSH) and
sshto ela and enter the password:
ssh <username>@ela.cscs.ch
- Generate a
ed25519keypair. On your local machine (not ela), dossh-keygenleaving the passphrase empty. Then copy your public key to the remote server (ela) usingssh-copy-id.
ssh-keygen -t ed25519
ssh-copy-id -i ~/.ssh/id_ed25519.pub <username>@ela.cscs.ch
Alternatively, you can copy the keys manually.
- Once your key is added to ela, manually connect to daint to authorize your key for the first time, while making sure you are logged-in in ela. Execute:
[classXXX@ela2 ~]$ ssh daint
This step shall prompt you to accept the daint server’s SSH key and enter the password you got from Moodle again.
- Edit your ssh config file located in
~/.ssh/configand add following entries to it, making sure to replace<username>and key file with correct names, if needed:
Host daint.alps
  HostName daint.alps.cscs.ch
  User <username>
  IdentityFile ~/.ssh/id_ed25519
  ProxyJump <username>@ela.cscs.ch
  AddKeysToAgent yes
  ForwardAgent yes
- Now you should be able to perform password-less login to daint as following
ssh daint.alps
Warning
At this stage, you are logged into daint, but still on a login node and not a compute node.
You can reach your home folder upon typing cd $HOME, and your scratch space upon typing cd $SCRATCH. Always make sure to run and save files from scratch folder.
Note
To make things easier, you can create a soft link from your $HOME pointing to $SCRATCH
ln -s $SCRATCH scratch
Make sure to remove any folders you may find in your scratch as those are the empty remaining from last year’s course.
Setting up Julia on Alps
The Julia setup on daint is handled by uenv, user environments that provide scientific applications, libraries and tools. The Julia uenv provides a fully configured environment to run Julia at Scales on Nvidia GPUs, using MPI as communication library. Julia is installed and managed by JUHPC which wraps Juliaup and ensures it smoothly works on the supercomputer.
Only the first time you will need to pull the Julia uenv on daint, and run Juliaup to install Julia.
- Open a terminal (other than from within VS code) and login to daint:
ssh daint.alps
- Download the Julia uenv image:
uenv image pull julia/26.3:v1
- Work-around a current limitations of Juliaup on Alps
mkdir $SCRATCH/tmp

export TMPDIR="$SCRATCH/tmp"
- Once the download complete, start the uenv:
uenv start --view=juliaup,modules julia/26.3:v1
Adding a view (--view=juliaup,modules) gives you explicit access to Juliaup and to modules.
- Only the first time, call into juliaup in order to install latest Julia
juliaup
At this point, you should be able to launch Julia by typing julia in the terminal.
Note
All Julia-related information can be found at https://docs.cscs.ch/software/prgenv/julia/
Running Julia interactively on Alps
Once the initial setup is completed, you can simply use Julia on daint by starting the Julia uenv, accessing a compute node (using SLURM), and launching Julia to add CUDA.jl package:
Warning
To perform any computation, you need to access a compute node using the SLURM scheduler.
- SSH into daint and start the Julia uenv
ssh daint.alps

uenv start --view=juliaup,modules julia/26.3:v1
- The next step is to secure an allocation using
salloc, a functionality provided by the SLURM scheduler. Usesalloccommand to allocate one node (N1) on the GPU partition-C'gpu'on the projectclass04for 1 hour:
salloc -C'gpu' -Aclass04 -N1 --time=01:00:00
Note
You can check the status of the allocation typing squeue --me.
👉 Running a remote job instead? Jump right there
- Once you have your allocation (
salloc) and the node, you can access the compute node by using the followingsruncommand:
srun -n1 --pty /bin/bash -l
- Launch Julia in global or project environment
julia
- Within Julia, enter the package mode
], check the status, and addCUDA.jlandMPI.jl:
julia> ]

(@v1.12) pkg> st

(@v1.12) pkg> add CUDA, MPI
- Then load CUDA and query version info
julia> using CUDA

julia> CUDA.versioninfo()
CUDA toolchain:
- runtime 12.8, local installation
- driver 550.54.15 for 13.0
- compiler 12.9

# [skipped lines]

Preferences:
- CUDA_Runtime_jll.version: 12.8
- CUDA_Runtime_jll.local: true

4 devices:
  0: NVIDIA GH200 120GB (sm_90, 93.953 GiB / 95.577 GiB available)
  1: NVIDIA GH200 120GB (sm_90, 93.951 GiB / 95.577 GiB available)
  2: NVIDIA GH200 120GB (sm_90, 93.955 GiB / 95.577 GiB available)
  3: NVIDIA GH200 120GB (sm_90, 93.954 GiB / 95.577 GiB available)
- Try out your first calculation on the GH200 GPU
julia> a = CUDA.ones(3,4);

julia> b = CUDA.rand(3,4);

julia> c = CUDA.zeros(3,4);

julia> c .= a .+ b
If you made it to here, you’re most likely all set 🚀
No display on daint
There is no interactive visualisation on daint. Make sure to save png figures or mp4 animations to disk instead of displaying them. CairoMakie.jl renders headless, so no further setup is needed. Build the figure once, collect the frames within the time loop and save the animation after it, such as
fig, ax, plt = heatmap(xc, yc, C; axis=(; aspect=DataAspect()), colormap=:turbo)
io = VideoStream(fig; framerate=5) # `io` collects the frames

# within the time loop
plt[3] = C # update the plot in-place
recordframe!(io)

# after the time loop
if isdir("viz_out")==false mkdir("viz_out") end
save("viz_out/anim.mp4", io)
Monitoring GPU usage
You can use the nvidia-smi command to monitor GPU usage on a compute node on daint. Just type in the terminal or with Julia’s REPL (in shell mode).
Using VS Code on Alps
VS Code can run on a compute node of daint through a tunnel: the VS Code server runs on the compute node, and VS Code on your computer connects to it. You can then edit files, and use the Julia REPL and the plot pane on the compute node as on your computer. You need a GitHub account to authenticate the tunnel.
Only the first time, install the Remote - Tunnels extension in VS Code on your computer, and the VS Code command line interface on daint:
ssh daint.alps

wget https://jfrog.svc.cscs.ch/artifactory/uenv-sources/vscode/vscode_cli_alpine_arm64_cli.tar.gz
tar -xf vscode_cli_alpine_arm64_cli.tar.gz
mkdir -p $HOME/.local/bin
mv code $HOME/.local/bin/
echo 'export PATH=$HOME/.local/bin:$PATH' >> $HOME/.bashrc
Log out and in again. Then, every time, start the tunnel on a compute node with the Julia uenv (here for 3 hours):
ssh daint.alps

srun --uenv=julia/26.3:v1 --view=juliaup -C'gpu' -Aclass04 -N1 -t180 --pty code tunnel --name=daint-tunnel
The first time, code tunnel asks you to log in with GitHub: open github.com/login/device and enter the code shown in the terminal. When the tunnel is ready, the terminal shows a link to https://vscode.dev/tunnel/daint-tunnel.
In VS Code on your computer, open the Remote Explorer pane, and select Tunnels. The tunnels are listed separately from the Remote - SSH hosts, and only with the Remote - Tunnels extension installed. Sign in with the same GitHub account, and connect to daint-tunnel. Alternatively, run Remote-Tunnels: Connect to Tunnel… from the Command Palette. Install the Julia extension in the remote window, if needed.
Troubleshooting the tunnel
If the tunnel doesn’t appear in VS Code, check in a second terminal on daint whether it is running with code tunnel status, and with which account it is registered with code tunnel user show.
Release the compute node
The tunnel, and thus the allocation of the compute node, ends when you close the terminal in which srun runs, or after the requested time. Stop the tunnel with Ctrl+C when you are done, so that the node is released.
If the tunnel doesn’t work for you, edit your files with the Remote - SSH extension on the login node, and run your scripts in a terminal on a compute node, as described in Running Julia interactively on Alps.
Using Git on Alps
To clone your private course repository on daint and push your changes from there, add an SSH key of daint to your GitHub account:
ssh daint.alps

ssh-keygen -t ed25519   # leave the passphrase empty
cat $HOME/.ssh/id_ed25519.pub
Copy the printed public key to GitHub (Settings > SSH and GPG keys > New SSH key). Then, clone your repository in your scratch folder, e.g. cd $SCRATCH; git clone git@github.com:pdes-on-gpus-julia-course/pde-on-gpu-<moodleprofilename>.git.
Scratch cleaning policy
Files on scratch that have not been accessed for 30 days are deleted automatically, and scratch has no backup. Commit and push your work to GitHub regularly.
Running a remote job on Alps
If you do not want to use an interactive session you can use the sbatch command to launch a job remotely on the machine. Example of a submit.sh you can launch (without need of an allocation) as sbatch submit.sh:
#!/bin/bash -l
#SBATCH --account=class04
#SBATCH --job-name="my_gpu_run"
#SBATCH --output=my_gpu_run.%j.o
#SBATCH --error=my_gpu_run.%j.e
#SBATCH --time=00:10:00
#SBATCH --nodes=1
#SBATCH --ntasks-per-node=1
#SBATCH --gpus-per-task=1

srun --uenv julia/26.3:v1 --view=juliaup julia --project <my_julia_gpu_script.jl>
Start the uenv first
Make sure to have started the Julia uenv before executing the sbatch command or to include --uenv julia/26.3:v1 --view=juliaup in the srun command.